


Ant Design Blazor is a UI component library for Blazor Framework. It contains a set of high-quality components. It supports .NET Core 3.1, .NET 5, .NET 6, and .Net 7. You can see an online demo created using Ant Design Blazor from this link. Let’s see how we can add Ant Design Blazor to our project. We can do that in 2 ways.
Add Ant Design Blazor To An Existing Project
Create New Project From Ant Blazor Templates
Add Ant Design Blazor To An Existing Project
Let’s see how to add this component library to an existing project. Here I use .Net Core 7 in my project. Normally, most developers use Microsoft Visual Studio for dotnet development. But I am a big fan of JetBrains IDEs. In this tutorial, I use JetBrains Rider IDE. But you can use Visual Studio. Open your project in IDE.
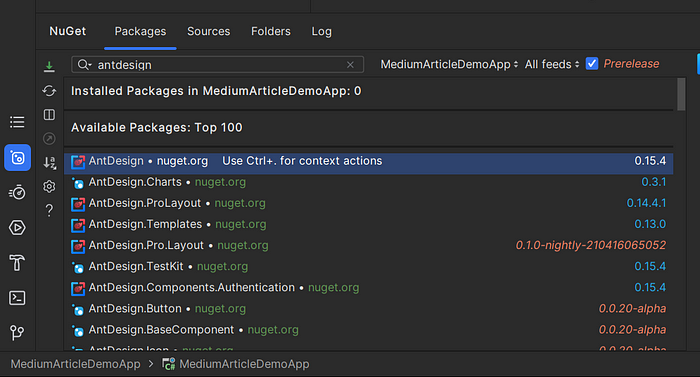
After opening your project, right-click on the solution name and click on “Manage NuGet Packages”. Now type “ant design” in the search box and select “AntDesign” from the list. After that select which version we need to install to your project and install Ant Design Blazor Library.
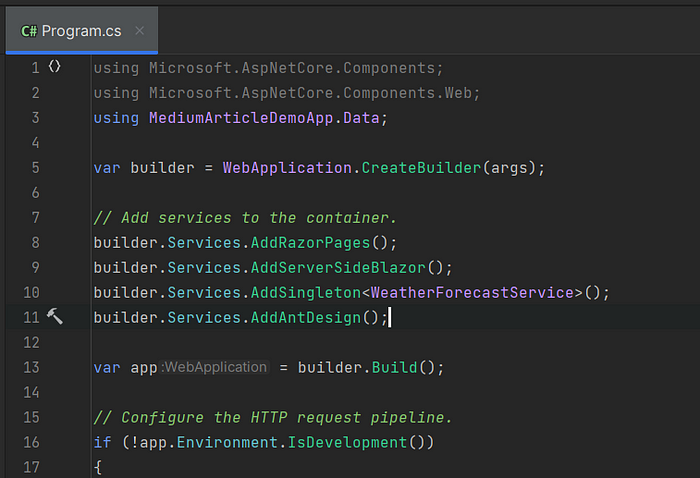
After installing Ant Design Blazor, it should be registered as a service. To do that, open the Program.cs file. Add this line to it.
// Program.cs
builder.Services.AddAntDesign();
Next, add static file links in “wwwroot/index.html” (WebAssembly) or “Pages/_Host.cshtml” (Server)
<!-- Add To Head -->
<link href="_content/AntDesign/css/ant-design-blazor.css" rel="stylesheet" />
<!-- Add To Body -->
<script src="_content/AntDesign/js/ant-design-blazor.js"></script>
Next, add the namespace in “_Imports.razor”
// _Imports.razor
@using AntDesign
Lastly, add the <AntContainer/> component in “App.razor”. to display the pop-up component dynamically,

We have added Ant Design Blazor to our Blazor project. Now we can use Ant Design Blazor components in our project. Let’s try it by adding the <Button> component.
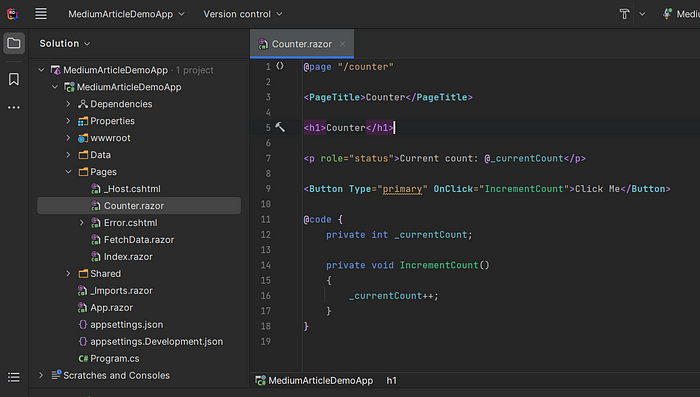
In the above code’s 9th line, I have added the <Button> component. Let’s run our project. This is the output.
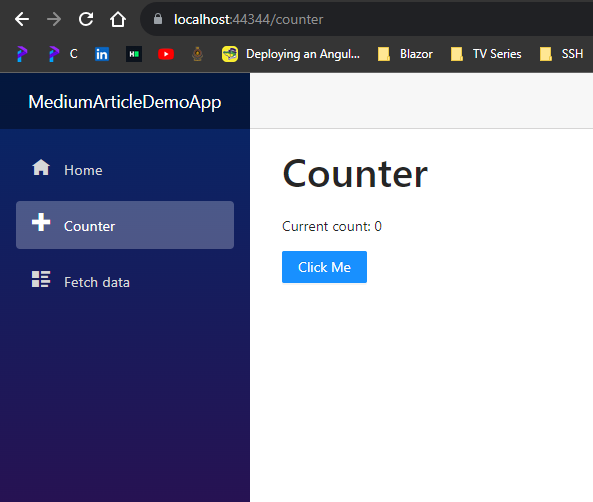
You can see the button component is there. You can explore other components as well. I hope this will help you.
Create New Project From Ant Blazor Templates
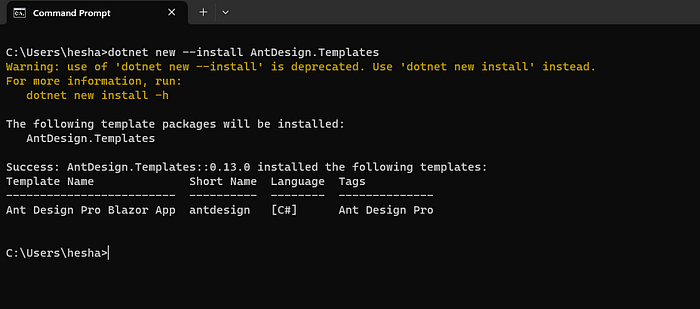
Ant Blazor also provides templates to create projects. To use that you have to install these templates. Type these commands in the command prompt
dotnet new --install AntDesign.Templates
After installing templates, you can create a project with these templates in 2 ways.
1. Create Using Rider IDE
If your installations succeeded, in the new project menu of the Rider IDE, you can see an option called “Ant Design Pro Blazor App”
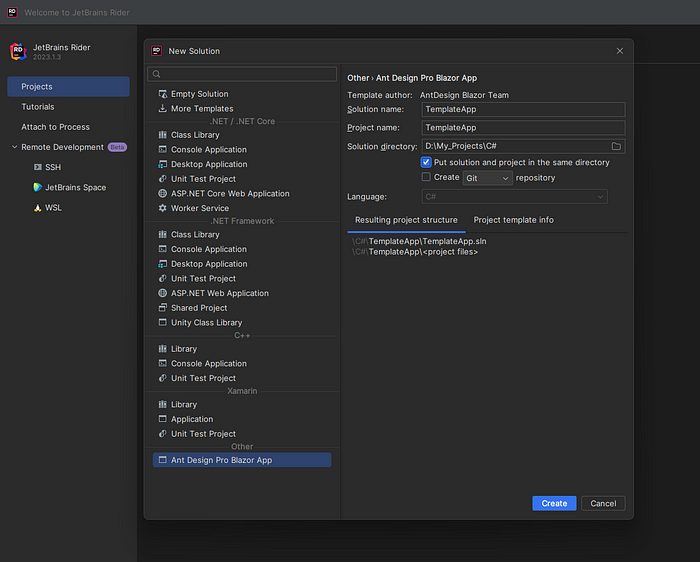
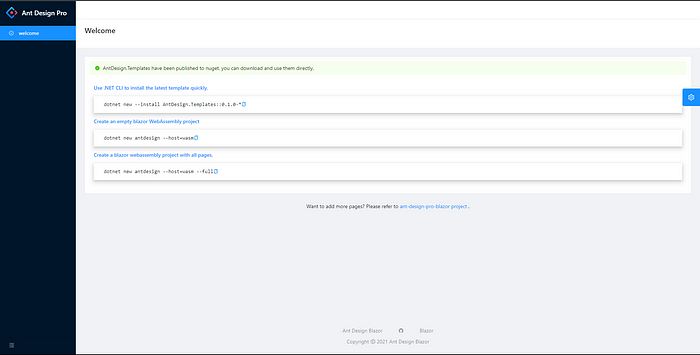
By selecting this option you can create a project with boilerplate code. Now run your project. You can see an output like this.
This boilerplate contains only the basic template. If you want the full boilerplate code, you have to go with the second method
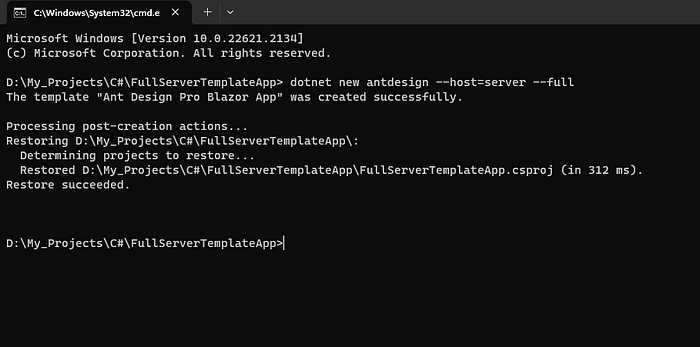
2. Create Using Command Prompt
In this method, you can choose what type of boilerplate code you want. Create a project folder and open the command prompt from that folder. Type this command in there. This code generates a full boilerplate code for the Blazor server app. If you want a Web Assembly app, change --host=server to --host=wasm
dotnet new antdesign -o MyAntDesignApp --host=server --full
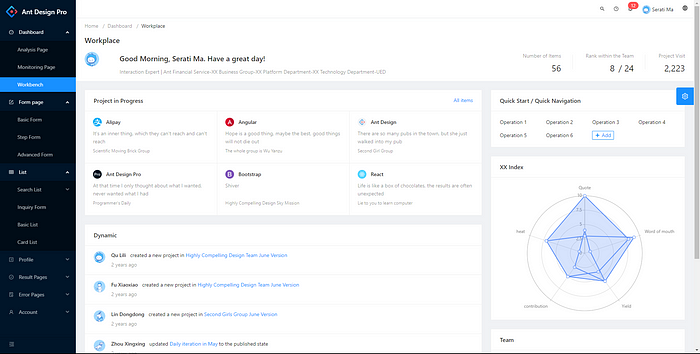
Now run your project. You can see an output like this
Now you know how to add Ant Design Blazor to your Blazor project. I think this article will help you.
If you found this article useful, don't forget to give a like. Happy Coding!

You can connect with me on https://hirushafernando.com/